Aprilia pegaso 650 cube carb removal
The 36 steps to remove the carburetor from an aprilia pegaso 650 (cube, model ‘97)
Intro
My ‘97 model Aprilia Pegaso 650. With the summer season coming to an end, it is time for some maintenance work, i’d like to remove and clean the carburetor.
I am by no means an expert mechanic but I like tinkering with machines.
To perform this operation I followed the procedure as described in the service manual.
This will be my first attempt at this.
The motorcycle in one piece. A relic from the past decade, no fuel injection, no fuel pump, no computers, just gravity and world war 2 technology .. love it !

Procedure
Outline
The carbs are well hidden, to get to them I have to remove the fuel tank and the exhausts, and a whole bunch of other screws.
Tools that are needed: no 4,5 allen wrench, no 10 wrench or socket key, long screwdrivers
Step by step procedure
- Remove the side fairings
- Disconnect the fuel pipes and sensor
- Remove the fuel tank
- Remove the fuel tank support plate
- Remove the pasager steppers
- Remove the exhaust silencers
- Tilt/pivot the rear subframe
- Loosen the carb fastening collars
- Disconnect the choke, acceleration cable
- Disconnect the idle screw cable
- Extract the carburetors
I start by closing the fuel tap on an almost empty tank, the manual calls for emptying the tank, which I won’t do.
Remove the sides by unscrewing screws 1-4 per side.
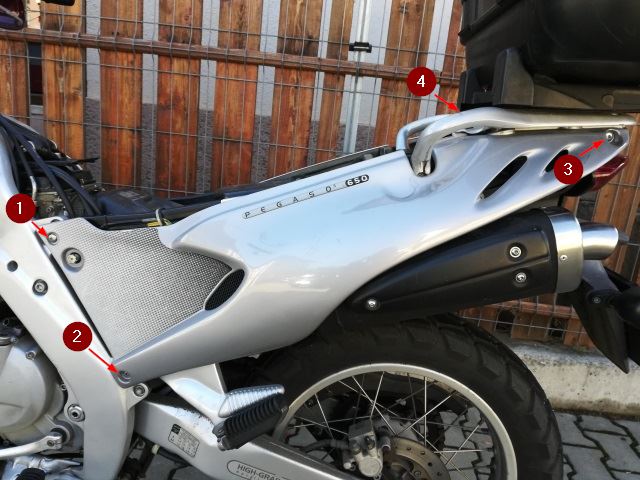
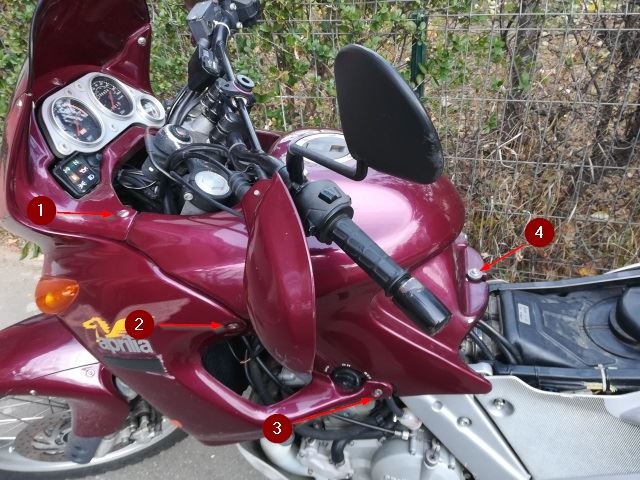
To remove the fuel tank, unscrew the tank fastener screws 1-3 per side and the screw 4 underneath the seat.
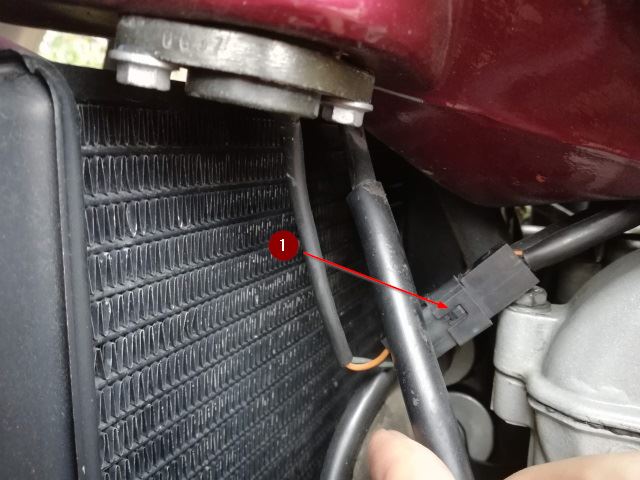
Disconnect the empty tank sensor 1.
Disconnect the main fuel pipe 1.

Disconnect the overflow pipe 1.
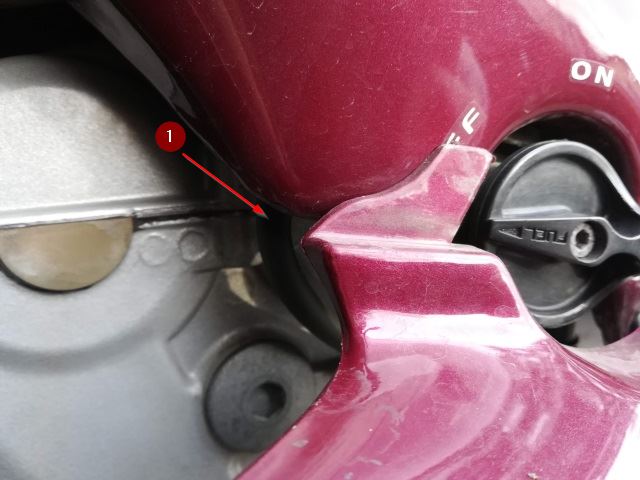
I can remove the tank now by gently lifting the rear side and pulling at an inclined angle. The front fairing is flexible and bends enough to make room, it does not have to be removed. I don’t have a separate pic for this
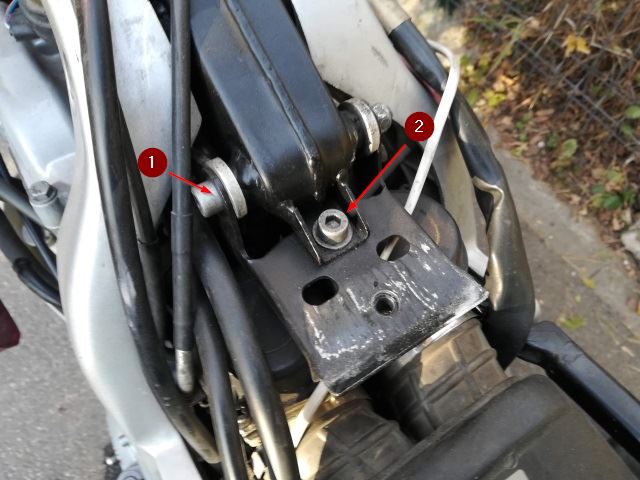
I remove the tank support plate, by unscrewing screws 1,2
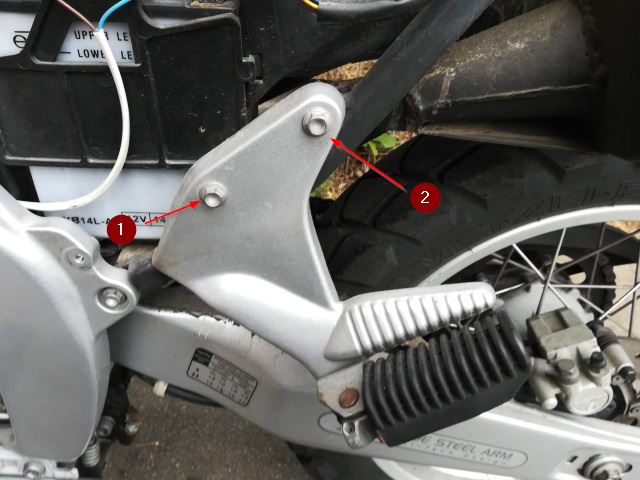
To remove the exhausts, first remove the 2nd passager’s steppers, by unscrewing screws 1,2
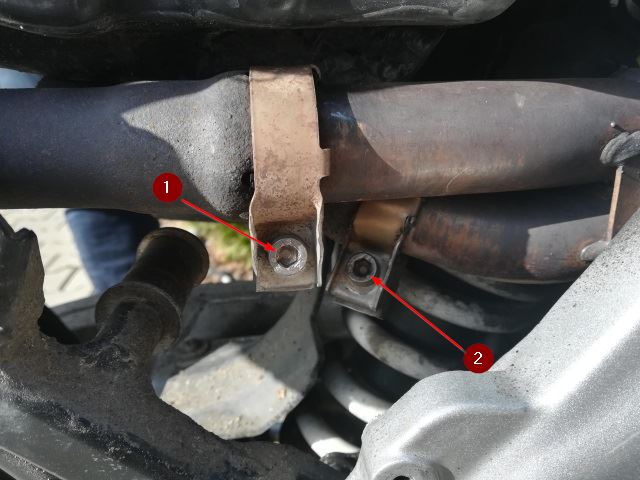
Loosen the exhaust silencer fasteners, screws 1,2
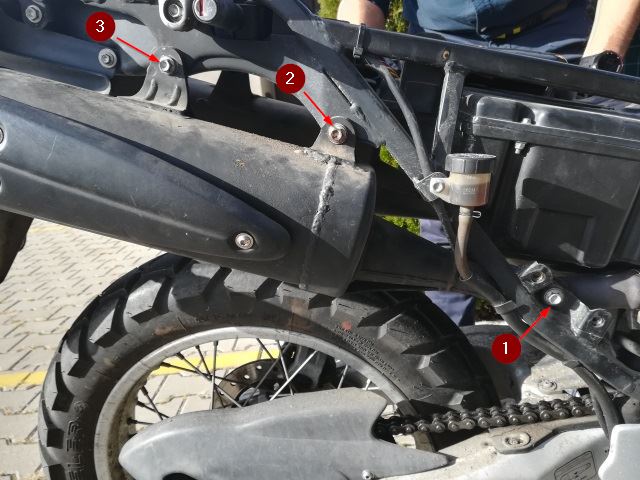
Unscrew screws 1-3 and slowly retract and remove the exhaust silencers.
Here are the tank and exhausts removed …
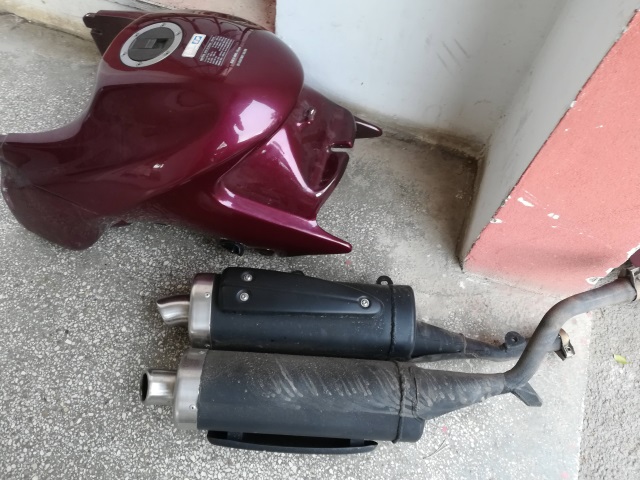
and the stripped motorcycle …
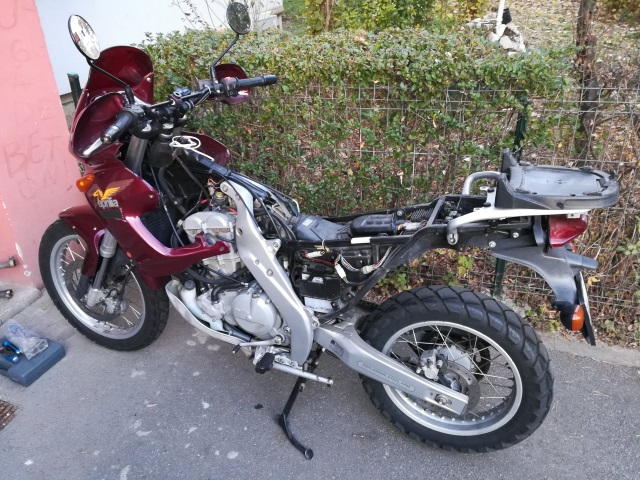
Next, ready to tackle the carbs …
First I loosen the collars on the carb air intake (not shown on pic)
I remove the two upper screws 1,2 holding the rear subframe, this will allow the subframe to pivot around the two lower screws (not shown on pic).
Gently tilt/pivot the frame to make a ~5cm gap. Once the gap is wide enough to pull the carbs out, I fasten the lower screws so that the frame stays in this position.
The next pic is showing the tilted subframe. The original/starting position is shown in the previous pic.
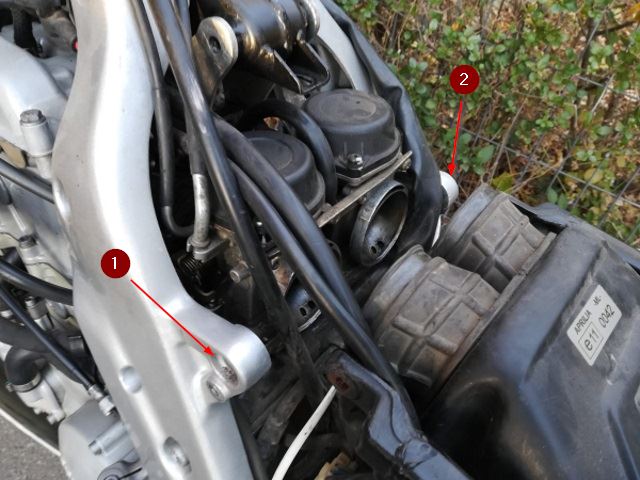
I loosen the collars on the engine side of the carb (not show on pic), pull on the carbs until they are out of the rubber intake manifold.
Before I take out the carbs I have to
- disconnect the choke cable, that’s the black plastic screw in pic and the choke plunger attached
1 - unhook the acceleration cable
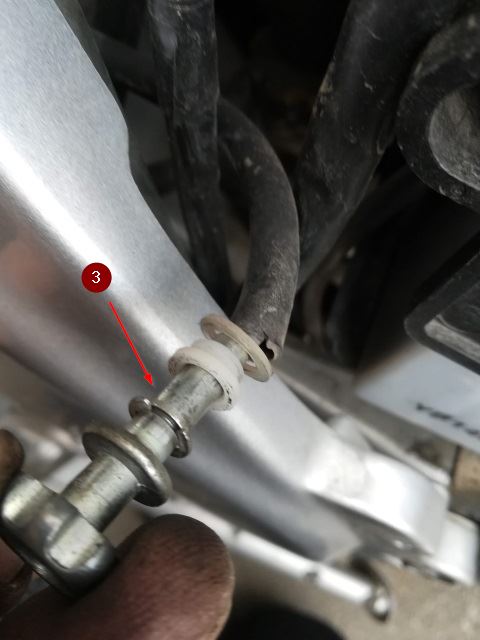
2 - disconnect the idle cable, see the hidden safety pin on the inside that has to come off in pic
3
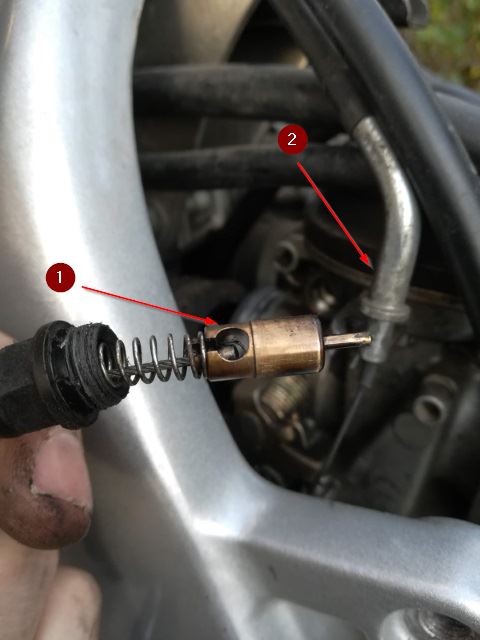
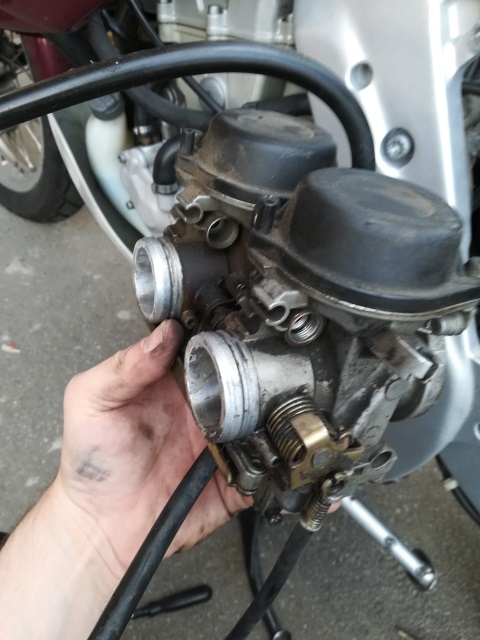
Finally the carbs taken out, two Mikuni bst-33 CV carburettors.
Learnings & tips
It took me about 3 hours to take everything off, probably second time I can do it much faster.
The parts that require extra attention
- To not damage the 20 years old rubber manifolds that hold the carburetor.
- The choke cable connector is a joke plastic screw, has to be handled gently to not damage the thread.
- To not lose the tiny parts: idle cable safety pin, choke plunger spring
This was a satisfying saturday afternoon work, I deserve a beer now.
Optimization The no. 4. Remove the fuel tank support plate is not mandatory, there is space to remove the carbs even with these attached.